“Extend Volume” greyed out

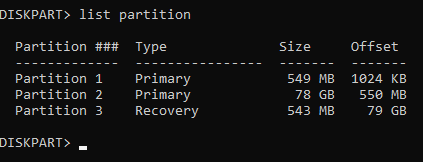
Recently, one of my friends got back to me saying that he could not extend the C drive. Upon checking, we figured out that the “Recovery” partition was sitting between the System partition and the Unallocated space.

Basically, the “Recovery” partition was blocking the feature. In order to fix this, we had to delete the “Recovery” partition. Will look at how we can fix the issue in a few simple steps. 

[Note: all the commands are in Bold Italic]

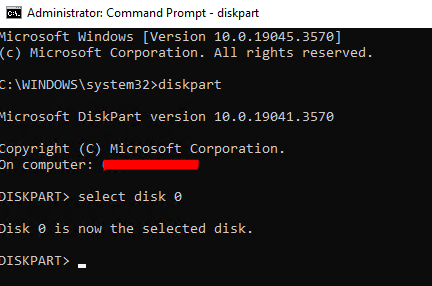
Step 01: Open an elevated command prompt and enter diskpart

Step 02: Select the relevant Disk and list the partitions 

select disk 0

list partitions

Step 03: Upon confirming, select the recovery partition (in my case, it is Partition 3)

Step 04: After selecting the correct partition, delete the partition. delete  partition  override

Step 05: Extend the volume using either the command extend or disk management in GUI. 

How to copy an Image file to another network device

In general, we copy/upload IOS image files to either flash or bootflash from a TFTP server. In case of timeouts or network delays with the TFTP server, we could use either USB or Memory Slots in order to copy image files to a network device. Once you are done copying the image to flash/bootflash, we can simply configure the network device itself as a TFTP server and can be used to copy image files across other devices. 

NOTE: Please make sure all the devices are in the same subnet 

In our example, we have used 2 Routers. Router 01 is preloaded with the Image files and will be configured as the TFTP server. Router 02 will be the TFTP client. 

Step 01: Make sure, the image file is already copied to the file location (flash or bootflash)

# show bootflash:

Step 02: Configure the Router as a TFTP server. And then assign the relevant image file

(config)# tftp-server bootflash:/“imagename”

Step 03: Log into Router 02 and copy the Image file from the TFTP server (Router 01)

#copy tftp bootflash:


[source: Cisco KB]