Typically, when working with the EUC/VDI solutions, the EUC admins and support professionals will have to troubleshoot agent connectivity and performance-related issues. To troubleshoot such scenarios, you will need the DEBUG logs. By default, DEBUG logging level is not enabled, so will have to enable DEBUG logging on the Horizon agent. Will see how we can enable that.
- First, browse the VMware Horizon Agent installation utilities directory (DCT)
C:\ProgramFiles\VMware\HorizonAgents\DCT>
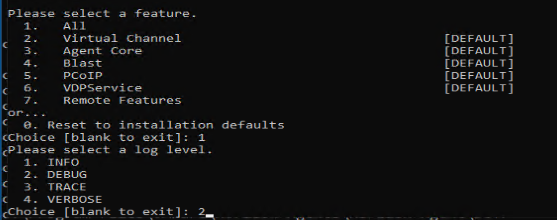
- Then, run the command support.bat loglevels to see the available logging levels
C:\ProgramFiles\VMware\HorizonAgents\DCT> support.bat loglevels
- You will be presented with the available log levels

- After reviewing, please select the desired log level (DEBUG) – option 2
- Finally, to generate the log bundle run the batch file. So that it will generate a ZIP file on the Windows Desktop system.