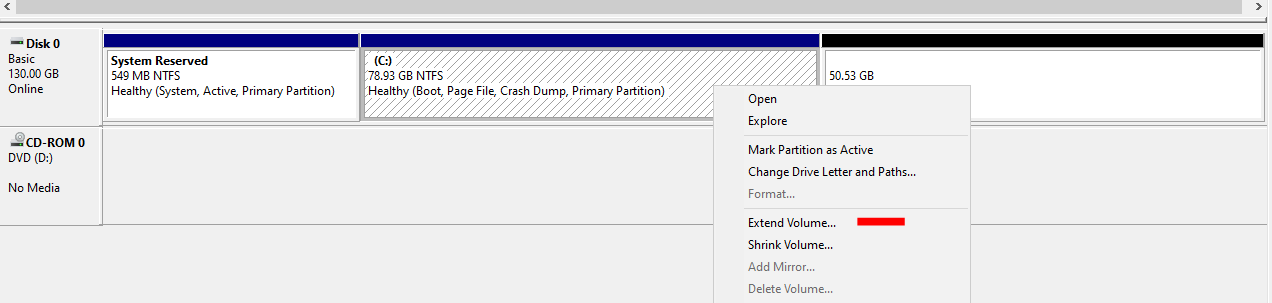
Recently, one of my friends got back to me saying that he could not extend the C drive. Upon checking, we figured out that the “Recovery” partition was sitting between the System partition and the Unallocated space.
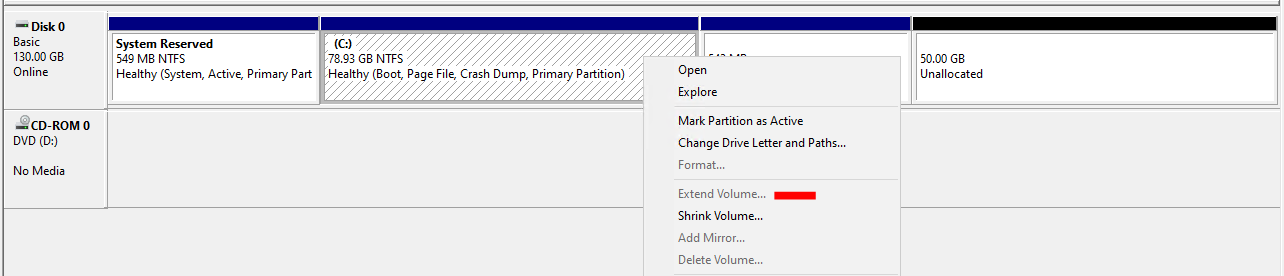
Basically, the “Recovery” partition was blocking the feature. In order to fix this, we had to delete the “Recovery” partition. Will look at how we can fix the issue in a few simple steps.
[Note: all the commands are in Bold Italic]
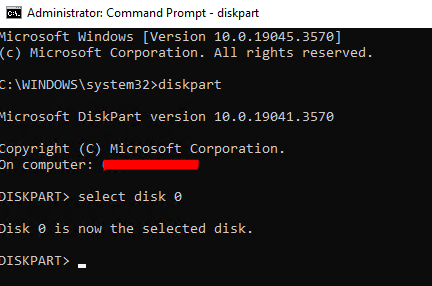
Step 01: Open an elevated command prompt and enter diskpart
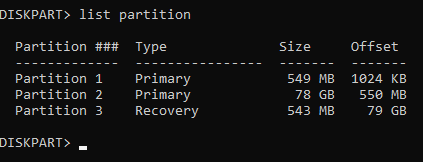
Step 02: Select the relevant Disk and list the partitions
select disk 0
list partitions
Step 03: Upon confirming, select the recovery partition (in my case, it is Partition 3)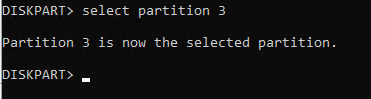
Step 04: After selecting the correct partition, delete the partition. delete partition override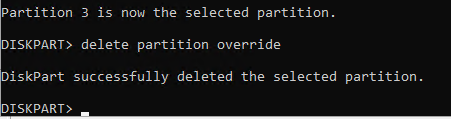
Step 05: Extend the volume using either the command extend or disk management in GUI.