A GUI tool for Volatility Memory Forensics

Volatility is a command line memory analysis and forensics tool for extracting artifacts from memory dumps. Volatility Workbench is free, open source and runs in Windows. It provides a number of advantages over the command line version including,

  • No need of remembering command line parameters.
  • Storage of the operating system profile, KDBG address and process list with the memory dump, in a .CFG file. When a memory image is re-loaded, this saves a lot of time and avoids the frustration of not knowing the correct profile to select.
  • Simpler copy & paste.
  • Simpler printing of paper copies (via right click).
  • Simpler saving of the dumped information to a file on disk.
  • A drop down list of available commands and a short description of what the command does.
  • Time stamping of the commands executed.
  • Auto-loading the first dump file found in the current folder.
  • Support for analysing Mac and Linux memory dumps.

Get started by downloading the tool

[source: https://www.osforensics.com/tools/volatility-workbench.html]

Setting up vSphere encryption

Starting from vSphere 6.5, vSphere supports VM encryption. for that a Key Management Server is required. Once a virtual machine is encrypted, vSphere needs somewhere to save the decryption key and for that it uses the KMS.VMware officially supports the use of 12 KMS products with vSphere. 

https://www.vmware.com/resources/compatibility/search.php?deviceCategory=kms&details

The above list is of products which have been specifically tested and certified by VMware.

After choosing the KMS solution, the appliance can be easily deployed through OVF Template.

Upon the successful deployment, You will now be shown the IP address of the KMS.

Then, you can do the rest configurations using the web browser.

Finally, you need to setup a secure two-way trust (default method is to use Certificates) between vSphere and the KMS. Once this trust has been established the full suite of vSphere encryption features will become available.

You will now be asked to upload a KMS Certificate and a KMS Private Key file. This is the certificate we created. Open the downloaded .ZIP file and you will see two .PEM files. Ignore the ‘cacert.pem’ file, instead use the .PEM file with the name you decided earlier.

Lastly, click establish trust.

Once all the above tasks are completed, you may get the chance to encrypt the desired VMs.

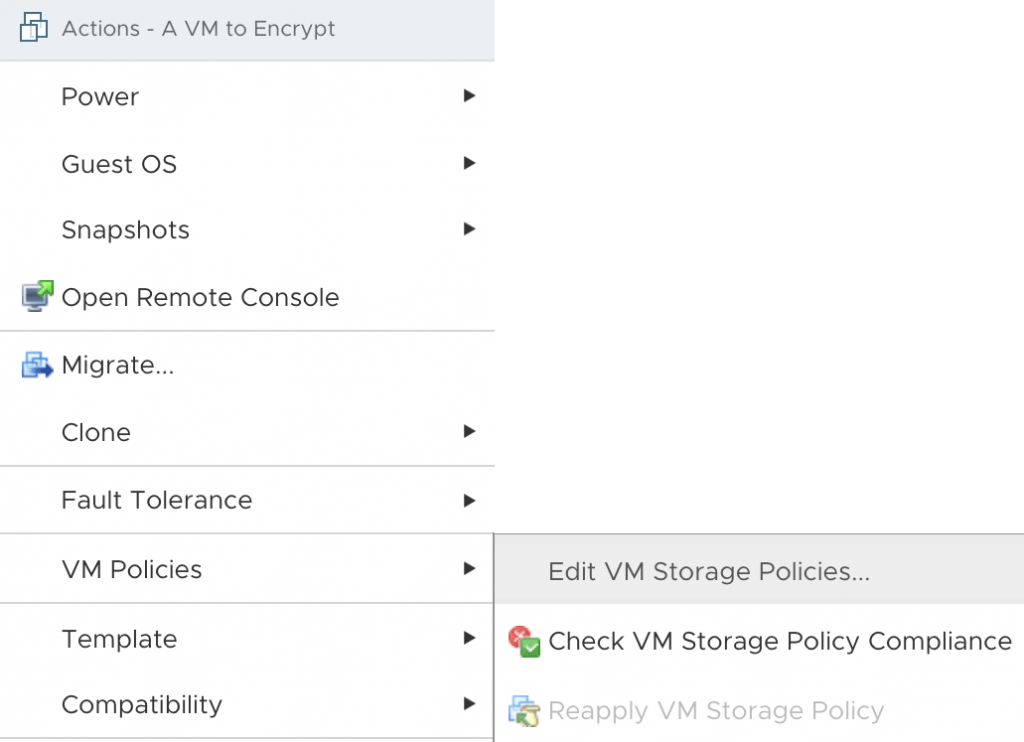
Within vCenter right-click on a virtual machine that you intend to encrypt, expand VM Policies and then select Edit VM Storage Policies, also make sure to change this to VM Encryption Policy. Once done select OK.