How to properly rollback configuration changes on Cisco devices

Recently, I had to reconfigure 20+ site-to-site VPN tunnels with IKEv2. Previously, they were running on IKEv1. But after a week time, we had to roll back the changes. One of my work colleague inquired about the rollback options. His plan was to use the command “copy start run“. But if we are looking at a full configuration rollback, we should be using the command “configure replace“.

The copy command MERGE the configuration but never replaces the configuration.  This command does not remove commands from the current running configuration that are not present in the source file. So, to overcome this issue, Cisco has released a command for this. The configure replace command provides the capability to replace the current running configuration with any saved Cisco IOS configuration file. This can be used to revert to a previous configuration state, effectively rolling back any configuration changes that were made since the previous configuration state was saved. 

In my case, the configuration backup was saved to the Flash: It does not matter where your configuration backup is located. 

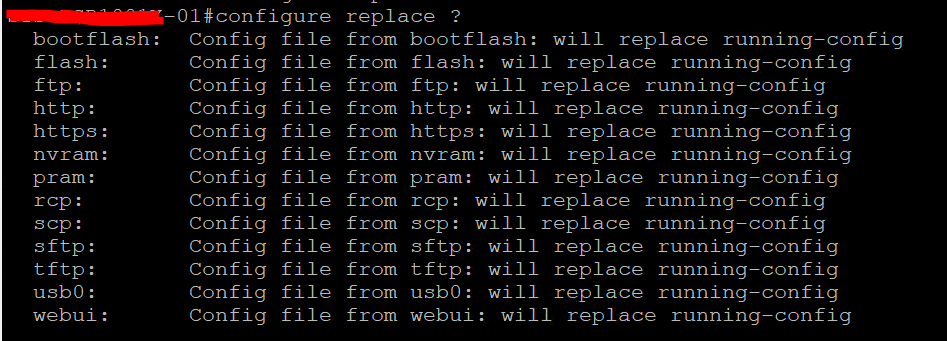
So, to roll back the changes you may simply run the below command (without []).

configure replace [saved-config-archive]


How to disable SSL and TLSv1&1.1 on F5 LTM for VMware iApp

Due to the cybersecurity compliance requirements, we had to disable insecure SSL and TLS protocol versions. Our infrastructure consists of VMware multi-tenants and F5 LTM as the ADC (Application Delivery Controller). Since the UAGs (Unified Access Gateway) sit behind the F5 LTM, the configuration changes need to be done at the F5 ADC. 

There was no proper article written specifically for this purpose. So, I thought of sharing this with the community. Let’s look at the steps involved in the configuration change. 

  • From the configuration utility, navigate to Local Traffic > Profiles > SSL > Client
  • Select the Client SSL profile used in the virtual server, and then change to Advanced

  • We need to change 2 fields (Cipers and Enabled Options)
  • Under the Ciphers, select Cipher Suites
  • In Cipher Suites, you need to change the value to DEFAULT:!RC4:!MEDIUM:@STRENGTH
  • Then, under the Enabled Options select only No TLSv1.3, No TLSv1.1, and No TLSv1 (refer to the below image)

  • Once you confirm the values, you may save the changes and test the access. 
  • If you need to confirm the security settings and collect evidence, you can simply test the URL with ssllabs