
Windows DUMP file provides information about the cause of the system crash. But generating a DUMP file on the ESXi system is a bit different. So, will look at the steps. We have divided the process into 2 main steps.
Step 01 – Create and download a VM snapshot
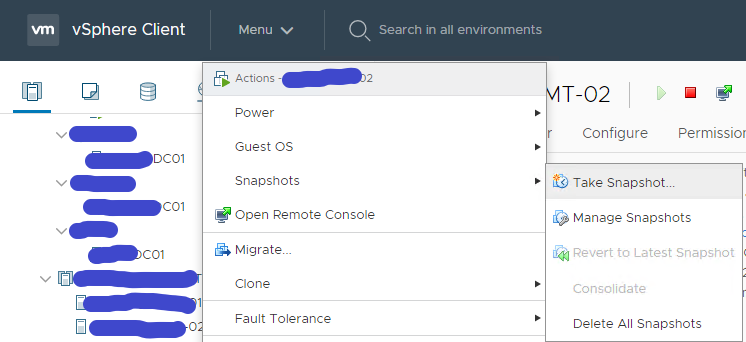
- In the VMware environment, select the virtual machine that has issues.
- Replicate the issue on the virtual machine.
- Right-click the virtual machine and click Snapshots → Take snapshot.
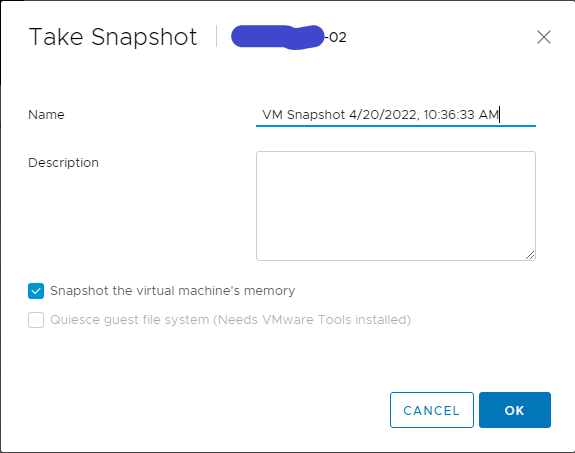
- Type the name, select the check box next to Snapshot the Virtual Machine’s memory and click OK.
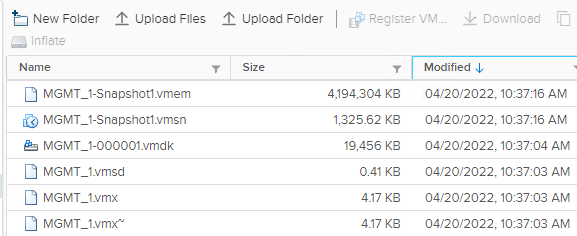
- Select the virtual machine and click Datastores and click the datastore name.
-
Select the virtual machine, select the .vmsn file (VMware Snapshot file), click Download and save the file locally.
Step 02 – Use the vmss2core tool to create a memory dump from the virtual machine snapshot
- Download Vmss2core.
- Select the check box next to I have read and agree to the Technical Preview License I also understand that Flings are experimental and should not be run on production systems. Select the file for your operating system from the drop-down menu (for example, if you want to run the tool on Windows, select vmss2core-sb-8456865.exe) and click Download.
- Place the vmss2core tool and the VMware snapshot file into the same folder.
- Run the vmss2core (vmss2core-sb-8456865.exe) in the command line with the following parameters.
- Specify the guest operating system from which the snapshot was created.
Use quotes if the filename contains blank spaces.
vmss2core-sb-8456865.exe -W8 “virtual_machine_name.vmsn”
- -W8 —Windows 8 and later or Windows Server 2012 and later.
- -W —Windows 7 and older or Windows Server 2008 and older.
Finally, you may use the WinDbg tool to analyze the generated Windows DUMP file.